Installation
Software Requirements:
- only for Binaural Renderer plugin, i.e. if you executed one of the full (Python x.x) installers: Python3 (64 bit).We recommend Anaconda3 Python distribution .
Windows
.exe file, and is for 64-bit versions of Windows only.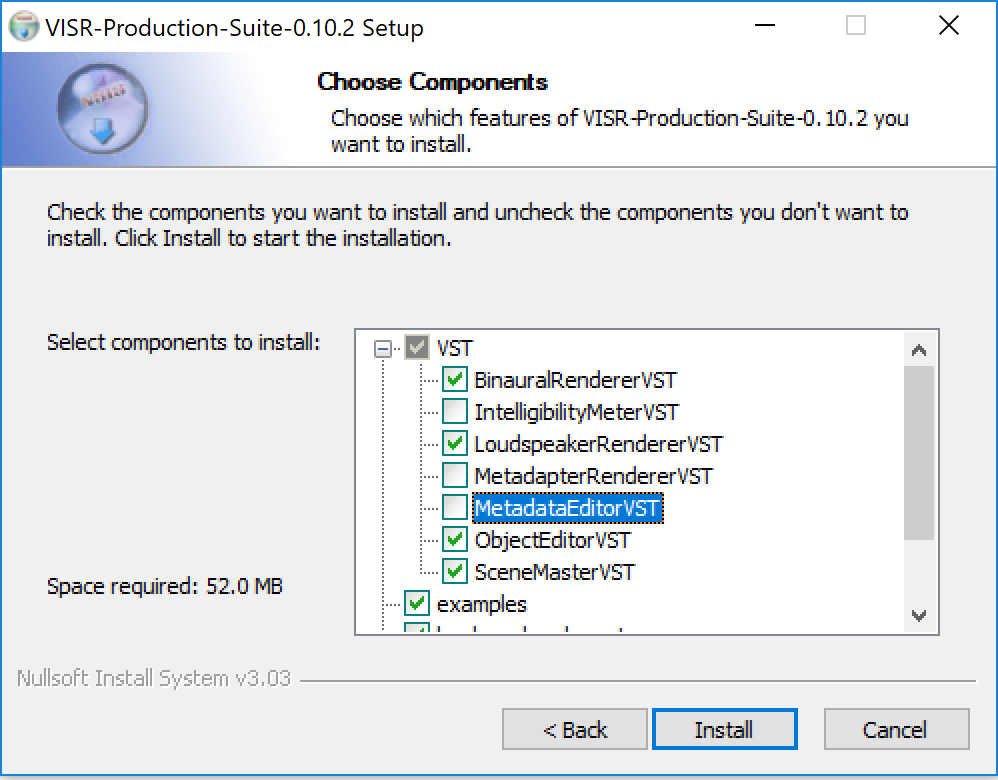
Graphical Windows installer.
PATH variable.Warning
If you have a previous installation of VISR, you may already have some <VISR-directory>\3rd and <VISR-directory>\lib folders in PATH, this could cause a problem if used in conjunction with the <install-directory>\3rd in case there is some library mismatch.
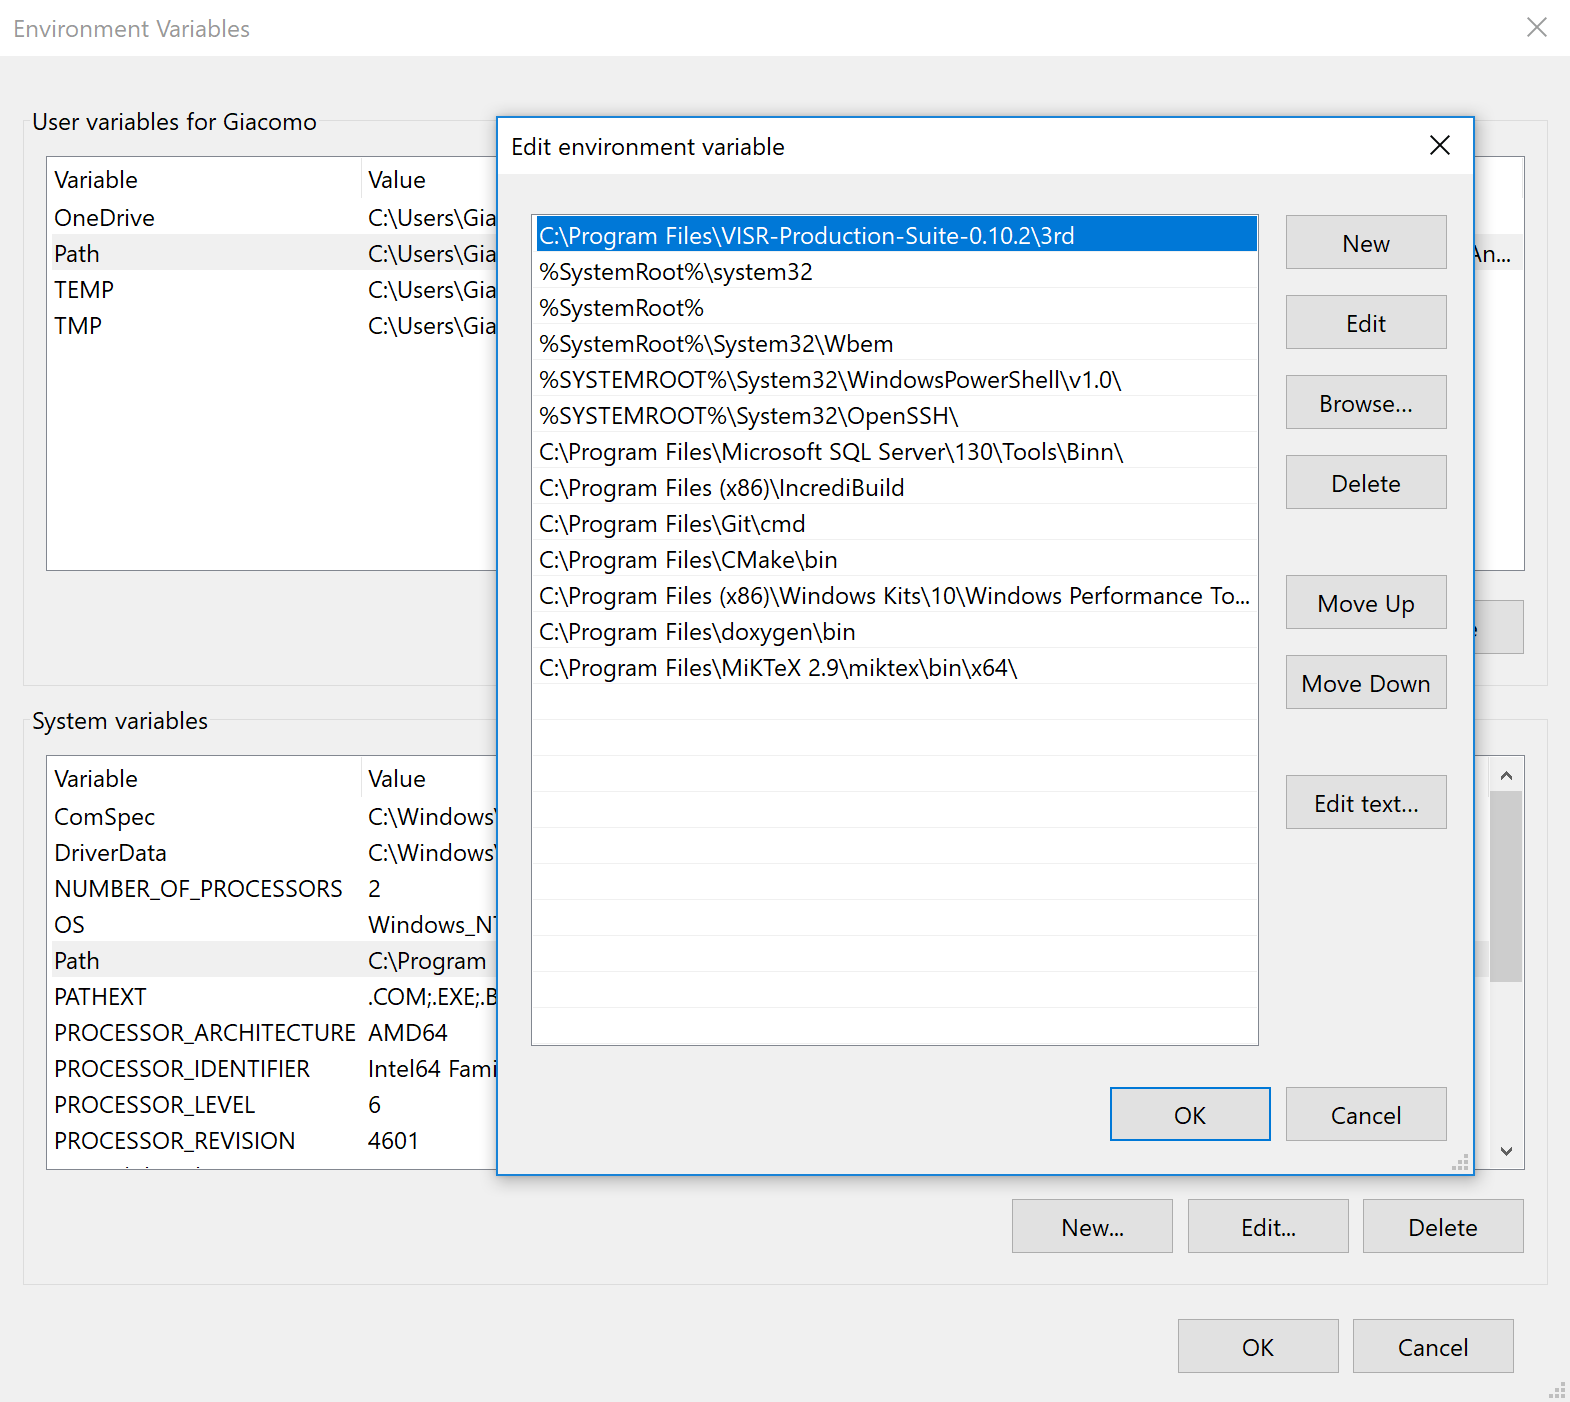
Environment variable editor on Windows 10.
<install-directory>\3rd to the path variable, where install_directory is the directory specified during the installation. When using the default installation path, that directory is C:\Program Files\VISR-Production-Suite\3rd .PATH user variable or the PATH system variable.Note
Any applications using the plugins of the VISR Production Suite (e.g. a DAW) must be closed and reopened before the changed paths take effect.
Note
Future versions of the installer might adjust the paths automatically. However, as pointed out in NSIS Path manipulation, this needs an extremely cautious implementation to avoid potential damage to users’ systems.
If you need to use the Binaural Renderer plugin, i.e. if you executed one of the full (Python x.x) installers, you need to perform some additional python configurations, described in Python configuration. If you are using a Standard installation package, no other steps are required and you can start following the Tutorial 1.
Mac OS X
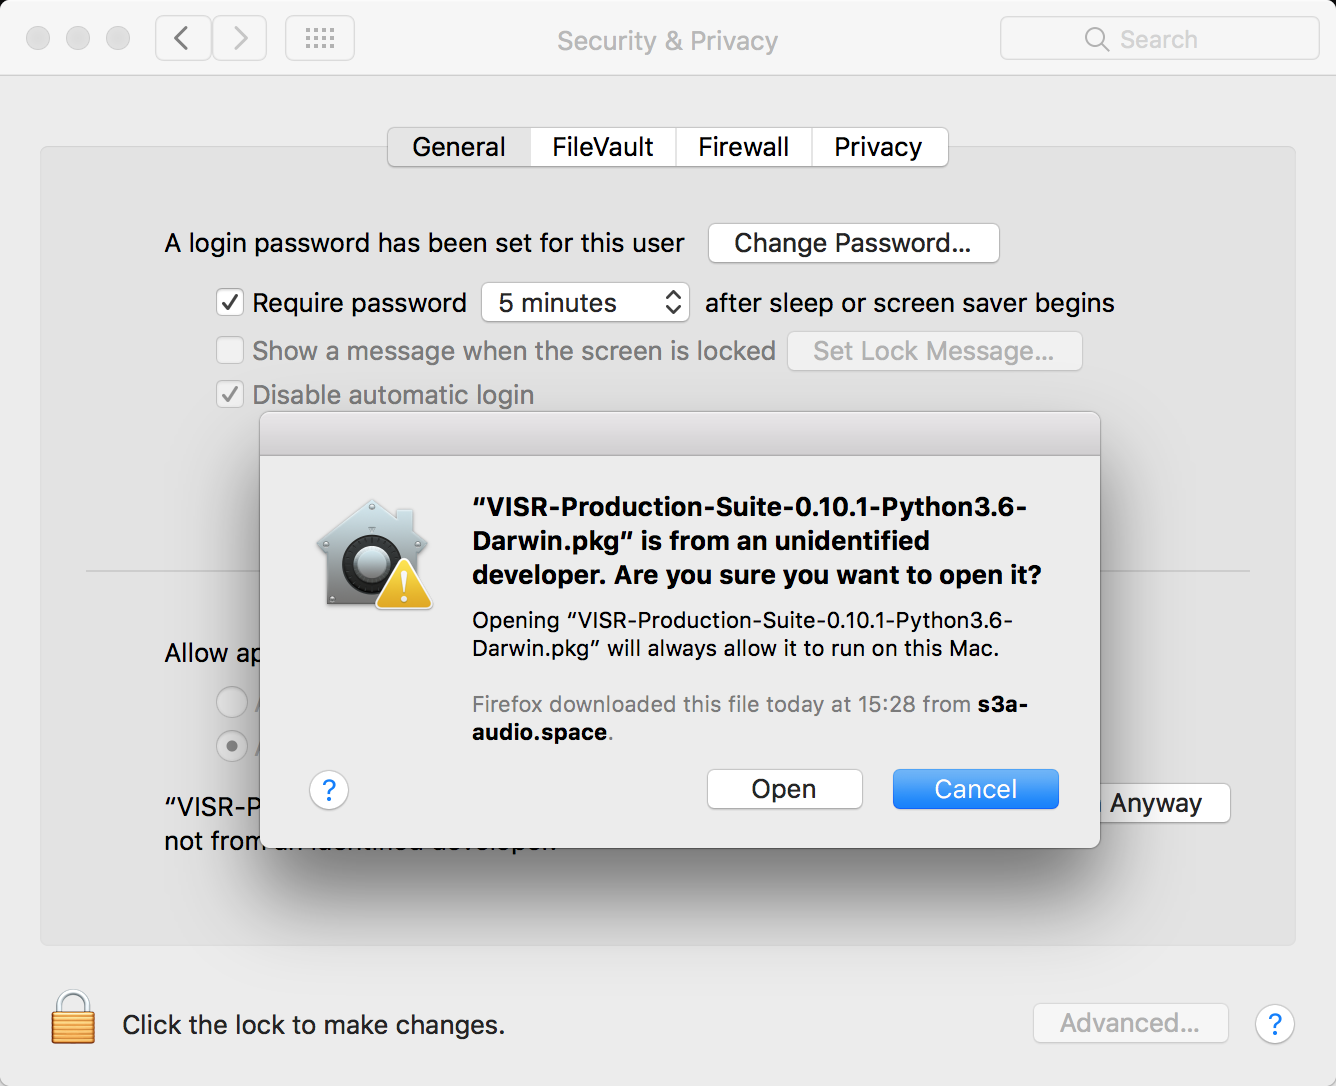
.pkg file.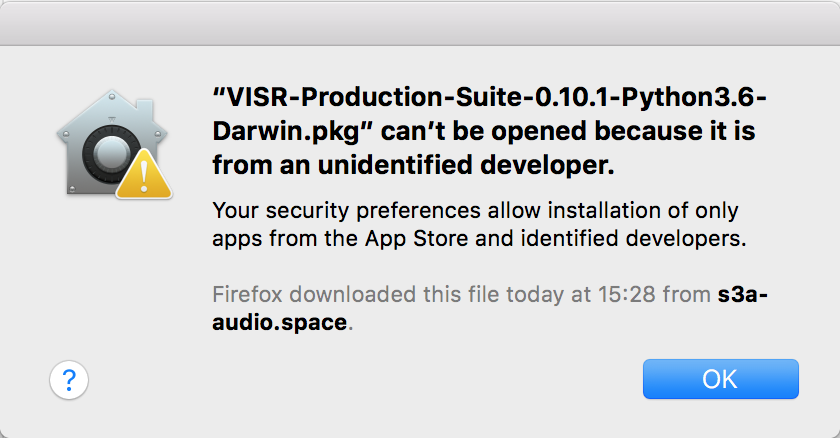
in that case open “System Preferences” -> “Security & Privacy” and press the button “Open anyway”. Then press “Open” in the pop-up window.
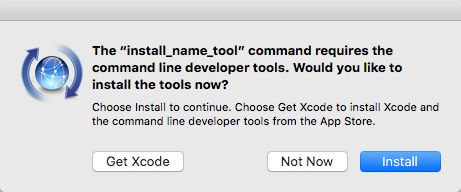
If your machine does not have the command line developer tools, you will be prompted to download them (see following Figure). Just accept that and it should automatically install those tools as part of the installation.
To access the component selection dialog, use the button “Customize” on the “Installation Type” screen
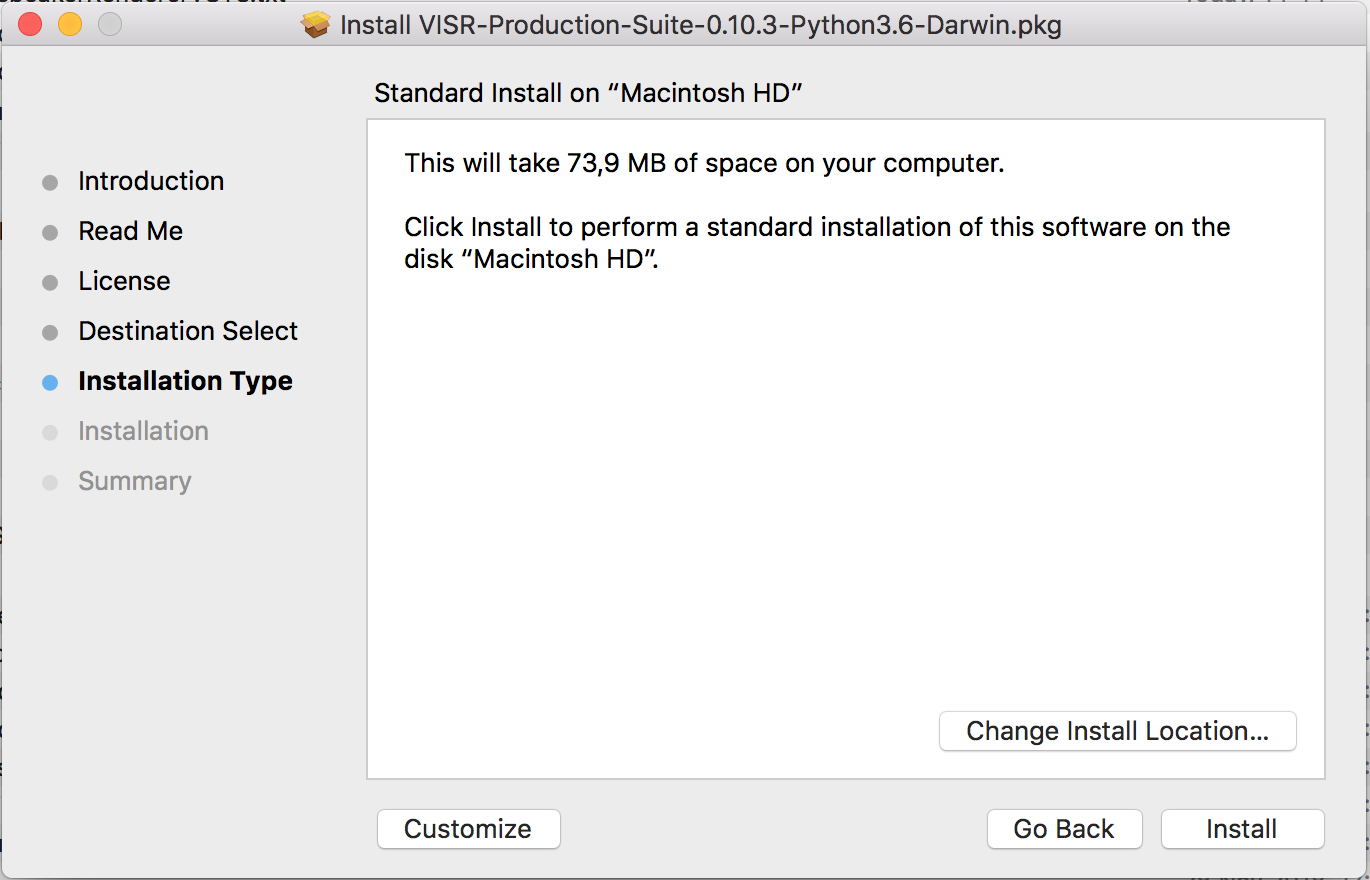
“Installation type” screen of Mac OS X installer. Use “Customize” to get to the component selection.
The figure shows the component selection dialog of the installer.
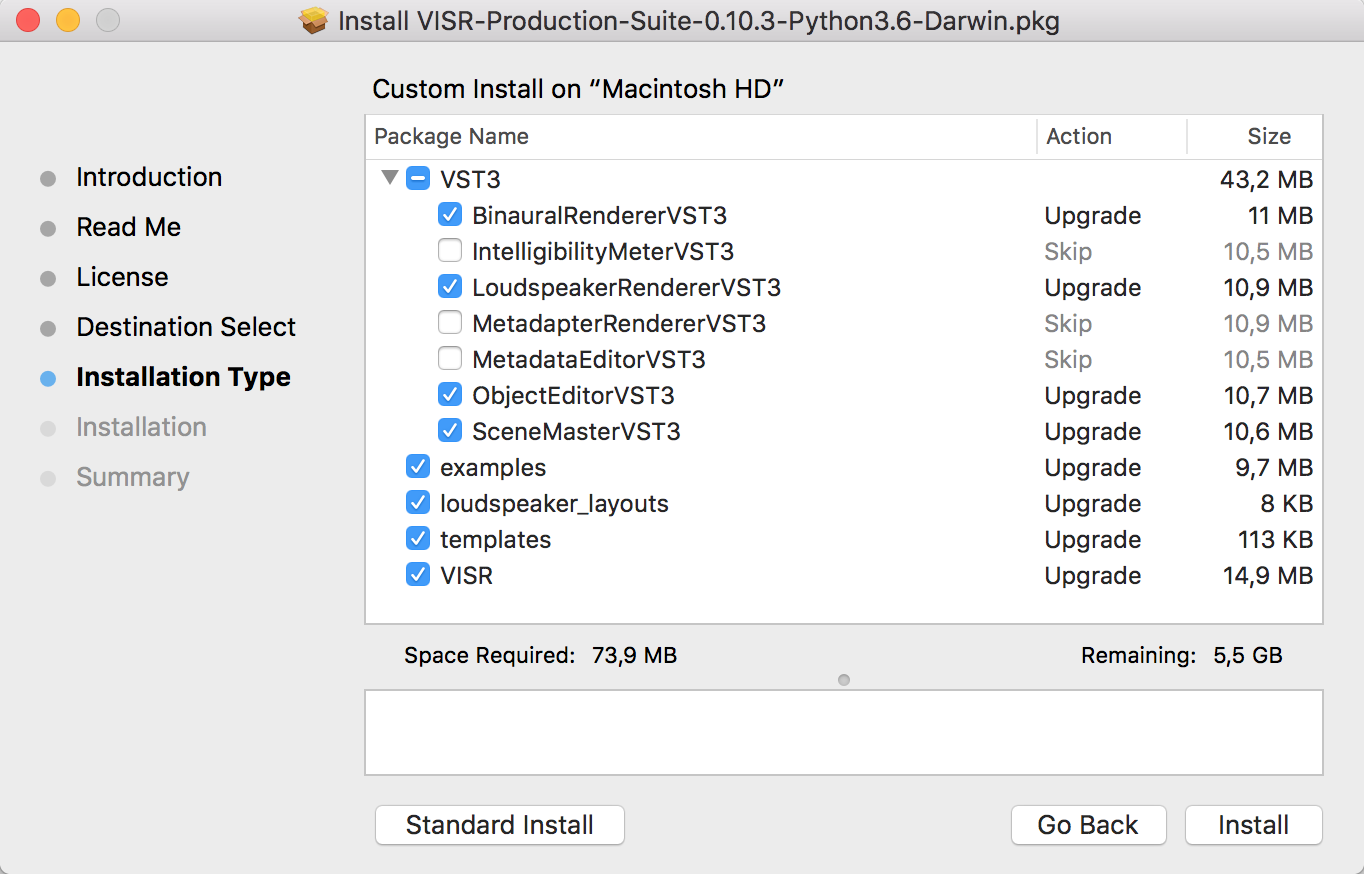
Component-based installer for Mac OS X.
Python configuration
Note
Follow this section of the guide only if you need to use the Binaural Renderer plugin, i.e. if you executed one of the full (Python x.x) installers
Two environment variables must be set to ensure the working of the VISR Python subsystem.
- PYTHONPATH
- This variable is used to add the directory containing the VISR python modules to the system path.The Binaural Renderer plugin uses the python package VISR BST (Binaural Synthesis Toolkit) which is provided as part of the installation. In order for it to work, the Python interpreter must know where this package is on the current machine.To this end, the
python/subdirectory of the installation folder must be added toPYTHONPATH.
- PYTHONHOME
- This variable is needed to locate the files and libraries of the Python distribution. This is especially important if there are more than one distributions on the system, most often on Mac OS X.This variable has to be set to the root directory of the Python distribution, i.e., one level of hierarchy above the
bin/folder conatining the Python interpreter.Depending on the platform and the distribution, the correct value might be:- Windows with Anaconda
C:\ProgramData\Anaconda3- Mac OS X with Anaconda
$HOME/anaconda3/
To find that path, you can use the following command on a command line prompt:python-config --prefix
or
python3-config --prefix
- OPENBLAS_NUM_THREADS ( Optional )
- It is advisable, in many cases, to set the value of this environment variable to 1. It controls how
numpynumerical algebra functions are distributed to multiple CPU cores.numpyis used by the VISR Python integration as well as in many Python-based VISR components performing mathematical or DSP operations.For the matrix/vector sizes typically encountered in our code, the overhead for distributing the work over multiple cores typically exceeds the potential gains.Multithreading is disabled by setting the maximum number of cores (or threads) to 1:OPENBLAS_NUM_THREADS = 1
How to set the variables
Depending on the operating system, these variables can be set as follows:
- Windows
Add the environment variables either as user or system variables, as described in Windows section. The correct settings are (assuming the default installation directory and the Anaconda distribution):
PYTHONPATH=c:\Program Files\VISR-Production-Suite\python
PYTHONHOME=c:\ProgramData\Anaconda3
OPENBLAS_NUM_THREADS=1
Note that if there is already a
PYTHONPATHvariable, the recommended value should be appended, using a semicolon as a separator.- Mac OS X
- In order to set the environment variables system-wide, without requiring that the applications in question is started from a shell, (e.g., a command-line terminal), we recommend a custom
launchdproperty list file, as detailed, e.g., in this StackExchange thread. In this way you can add a LaunchAgent that sets this variable for you.For convenience, the installers provide a pre-configuredVISR-Production-Suite.plistfile in theresourcessubdirectory of the installation directory (e.g.,/Applications/VISR-Production-Suite/resources/VISR-Production-Suite.plist).By convention, these files should to be stored in/Library/LaunchAgents/.Warning
if you used this same mechanism in the past for registering PYTHONPATH and PYTHONHOME (e.g for installing VISR ), it is necessary that you unload (
launchctl stop <nameOfOldPlist>and thenlaunchctl unload <nameOfOldPlist>) and then remove the files beginning with VISR in/Library/LaunchAgents/and in~/Library/LaunchAgents, if any. Then start the Terminal application (restart it if it is already open) and ensure thatecho $PYTHONPATHgives you an empty result. If not, a restart of the machine and re-check is suggested.This file can be either loaded directly or copied to theLaunchAgents/directory first. Please check the values in this file first and adjust them accordingly.If you want to copy the providedVISR-Production-Suite.plistusing command line, open the Terminal application and type the following command, providing your administrator password when prompted:sudo cp <install-directory>/resources/VISR-Production-Suite.plist /Library/LaunchAgents/
where
<install-directory>is the current installation folder. If you installed the software in the default install folder the command is:sudo cp /Applications/VISR-Production-Suite/resources/VISR-Production-Suite.plist /Library/LaunchAgents/
To activate the settings, call:
launchctl load /Library/LaunchAgents/VISR-Production-Suite.plist
To take effect, all applications using these settings (e.g. DAWs) must be quit and reopened.
These settings are preserved if the machine is restarted. To deactivate them, the property list file must be unloaded:
launchctl unload /Library/LaunchAgents/VISR-Production-Suite.plist
If you made changes to the settings, you have to perform the
unloadcommand followed by aload.Now, to test that the path is set correctly, restart the Terminal application and check the PYTHONPATH by typing:
echo $PYTHONPATH
The output should be
/Applications/VISR-Production-Suite/python.
Additional required modules
By default anaconda3 does not come with the pyserial module installed, which is needed by the Binaural Render plugin. To do so open Terminal application and type:
conda install pyserial
Another module that might not be present in your python distribution , is h5py. To install it run the following command:
conda install h5py
You can now start following the Tutorial 1 to know how to use the plugins.
Note
After the installation, to see the Binaural Renderer, normally a re-scan of the plugins is needed on the DAW you are using.