First of all, to avoid having to create an object-based session from scratch everytime, you can use the provided templates inside <install-directory>/resources/DAW_Templates folder, where install_directory is the directory specified during the installation. The default position is /Applications/VISR-Production-Suite-0.10.3/resources/DAW_Templates .
Note
While you can skip this tutorial and start using the templates, it is important for you to understand the manual configurationd that need to be performed, because you will likely need them, e.g. when you want to add a new object track.
REAPER
As a starting point, create a new project and create 4 audio tracks.
On the first two tracks place one Object Editor plugin each, opening the FX window on each track and clicking the “add” button.
As said in the previous tutorial, each Object Editor, and thus every track that becomes an audio object, has an ID field which is the object identifier, that must be unique.
When you add a new Object Editor the default ID is always 1. You must ensure that each instance of the plugin has a different ID number by manually adjusting the ID values.
In this case, having just two object tracks, it is sufficient to change the ID value of the Object Editor in the second track, from 1 to 2. Following the same logic, if you need more objects you will increase the object ID progressively in the new Object Editor instances.
Once you have done that, a Scene Master plug-in is needed, which will collect the information regarding the two audio objects. To do that, add a Scene Master plugin through the FX button on the third track.
Now you should already see that the changes performed on the Object Editors are mirrored in the Scene Master.
Then we need a renderer in place to eventually use those object information for rendering.
Therefore place one renderer of your choice (Loudspeaker Renderer or Binaural Renderer) in the remaining track.
Remember that if you want to use more than two output channels (default for Reaper tracks) you always have to change the number of channels of the track, via the “Route” button (on the track) -> “Track channels”. This is the case for the Loudspeaker Renderer, where you may want to support audio formats with more channels than just stereo: the suggestion is to set the number of channels to 64, which is the maximum number of channels for a track in Reaper.
Note
to see and instantiate the Binaural Renderer, you might need to perform a “clear cache/re-scan” of the plugins after installing. To do that press the corresponding button in REAPER “Preferences” window, under “VST” tab.
Now add two mono files of your choice to the two object tracks.
At this point there is one thing missing: the audio content from each object track needs to be routed to one of the renderer’s channels.
To do so, press the “Route” button in the first object track and go to “Add new send…” drop-down menu to select the renderer track, as shown in figure.
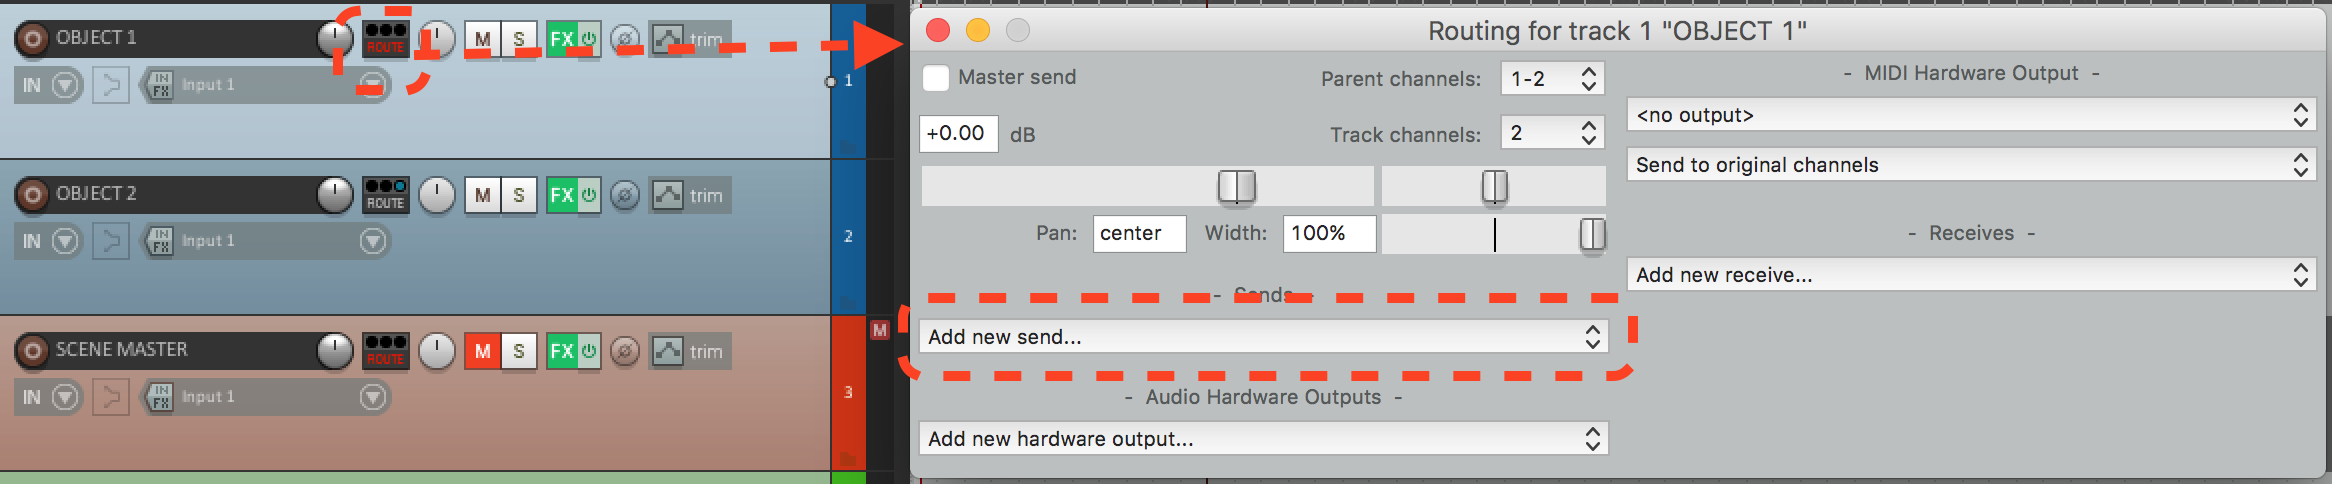
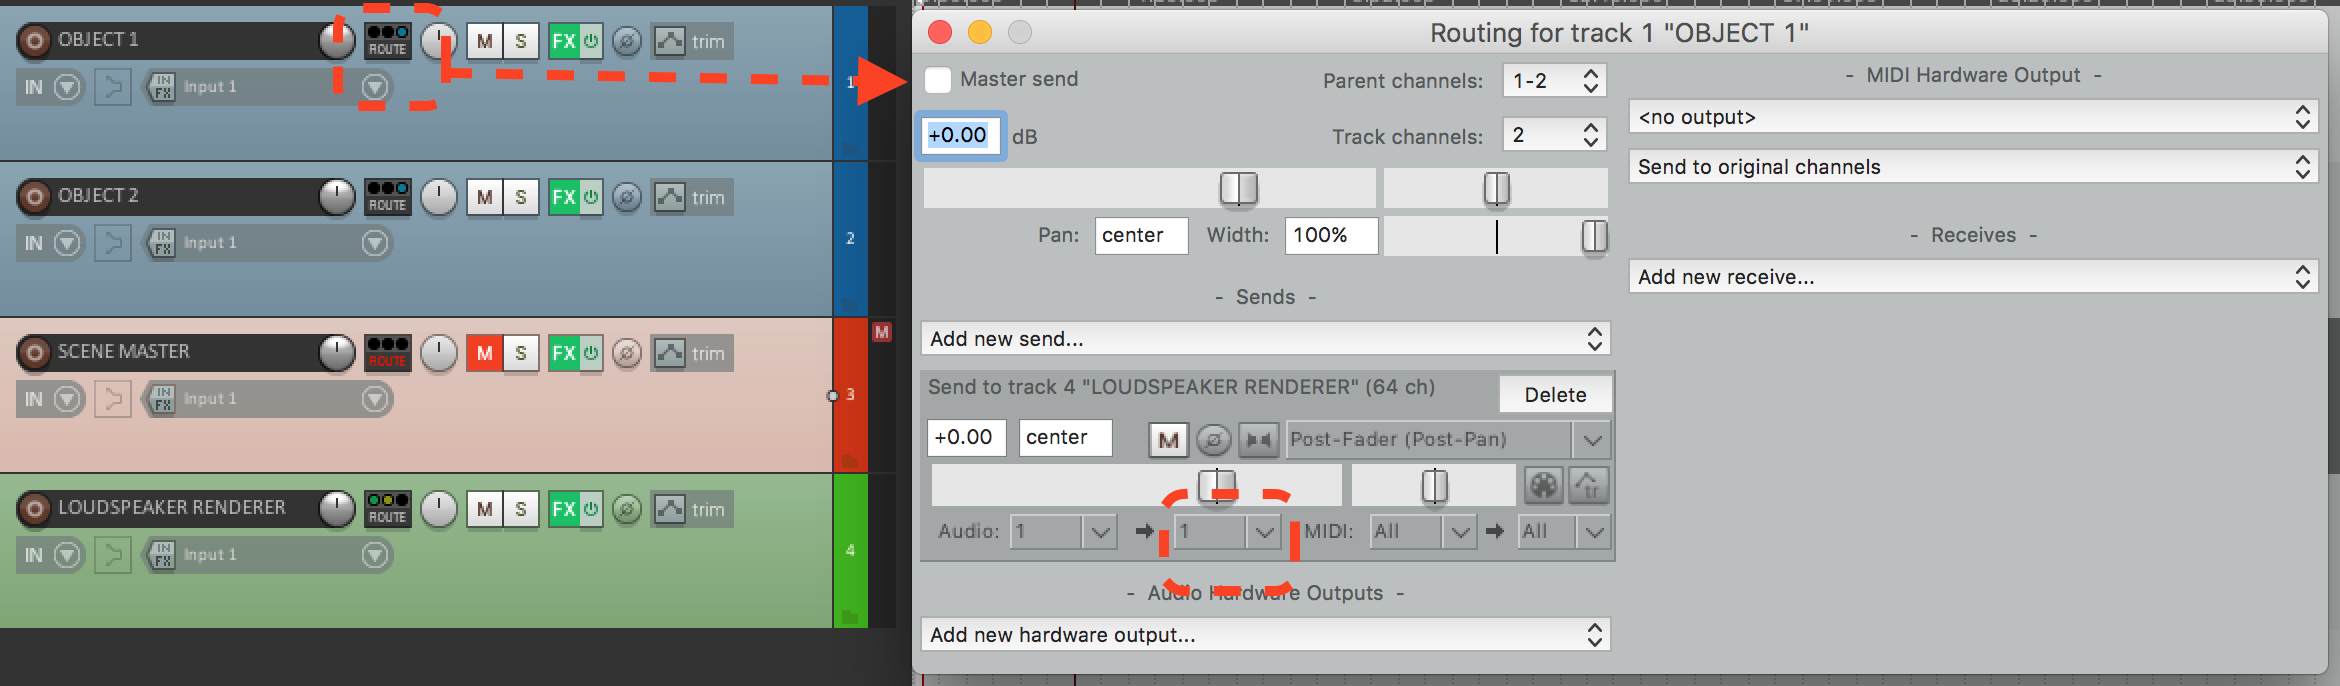
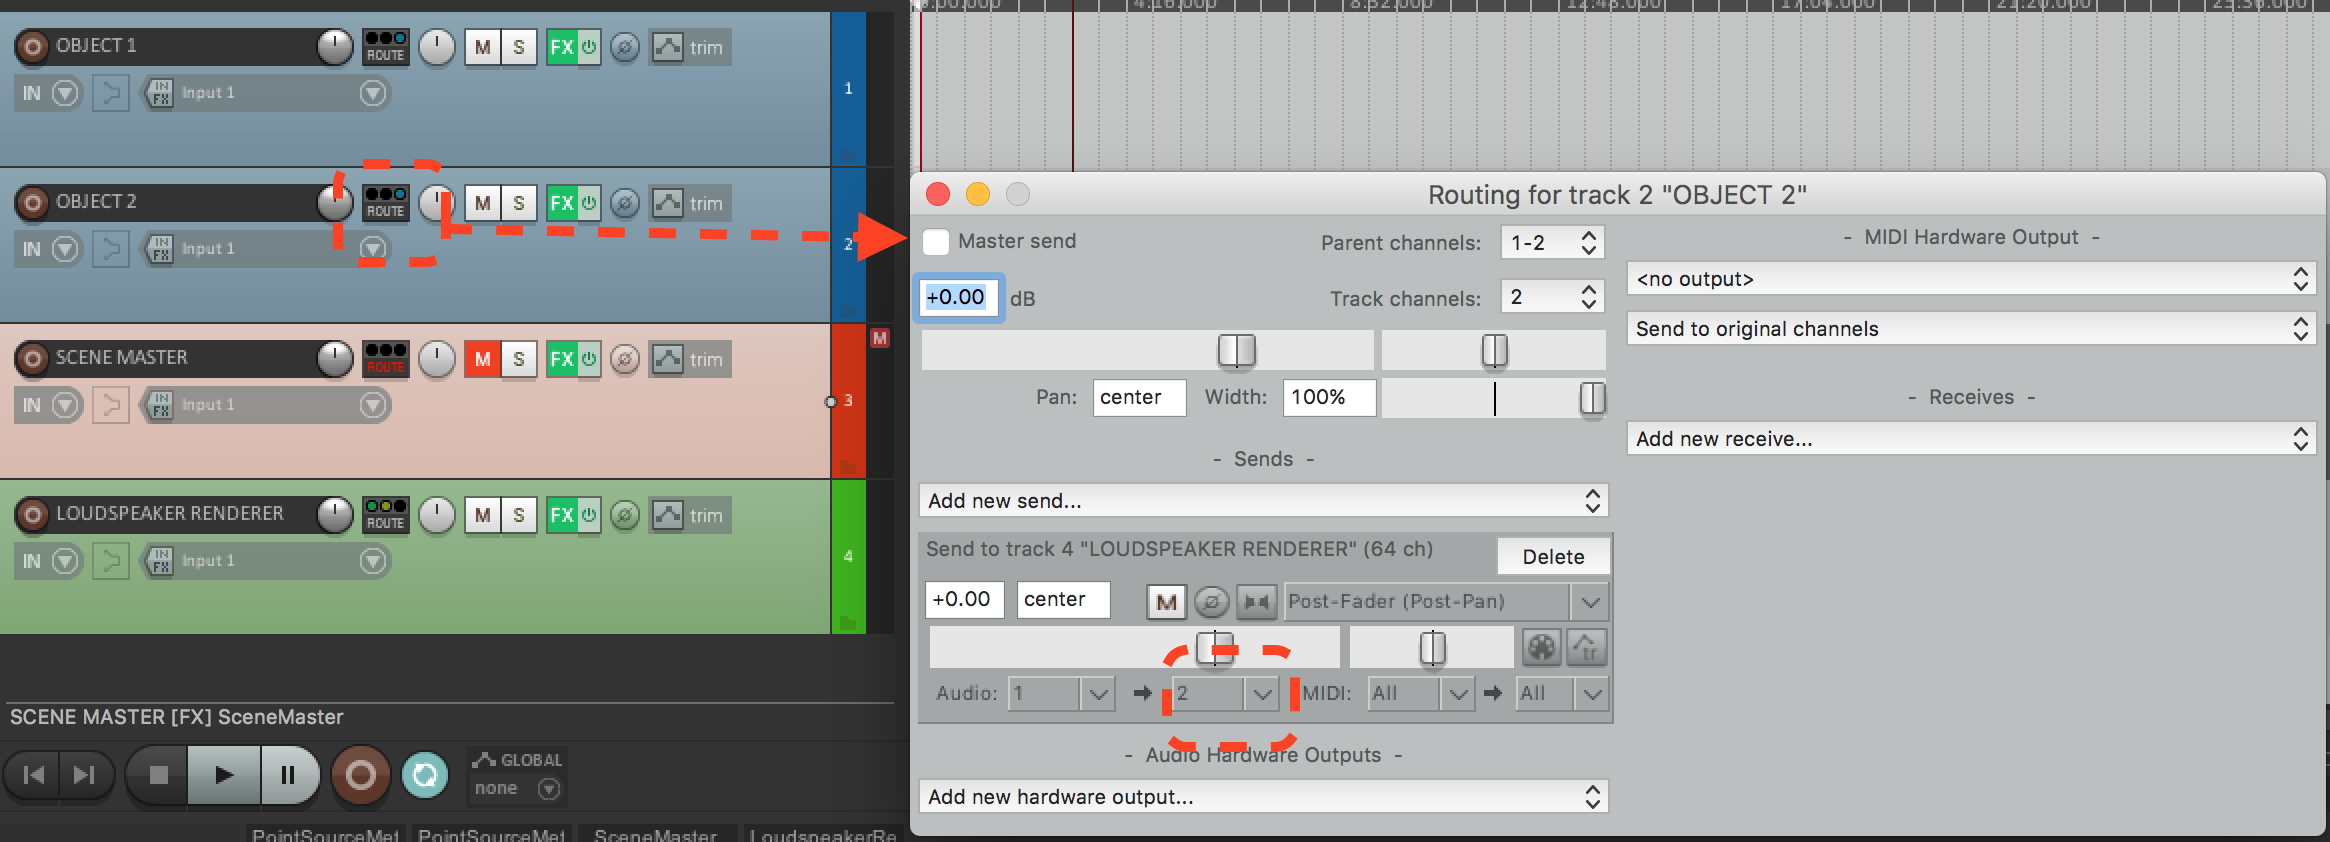
Also remember to untick the “Master send” checkbox on each object track, since we do not want to send it to the master track, but just to one of the channels of the object-based renderer track.
It is crucial that each audio object is routed to a different input channel of the track where the object-based renderer is:
Conclusion
Now you should have everything in place and you can start the playback and listen to your first object-based session!
You can follow the same procedure for session with many more objects, being aware of the necessary attention that needs to be paid to the objects IDs and routing channels configurations.